
Our Pinterest feed is full of gorgeous braids, but the one look we wanted to learn was the waterfall braid. This romantic braid has a whimsical feel with draping pieces that make it appear to be more challenging than it really is.
Stylist Olivia Halpin of DreamDry showed us how to do a simple waterfall twist that we promise you can easily pick up at home. The best part is that it’s a braid made for leaving your hair down, so you can show off your long locks. Just keep reading to see our step-by-step tutorial!
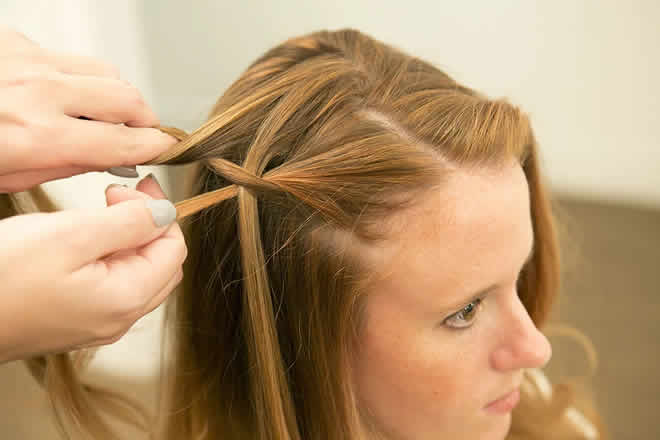
Step 1.

To start your waterfall twist, take two sections of hair.
Step 2.

Cross the section of hair along your hairline over the other section, so it’s going away from your face.
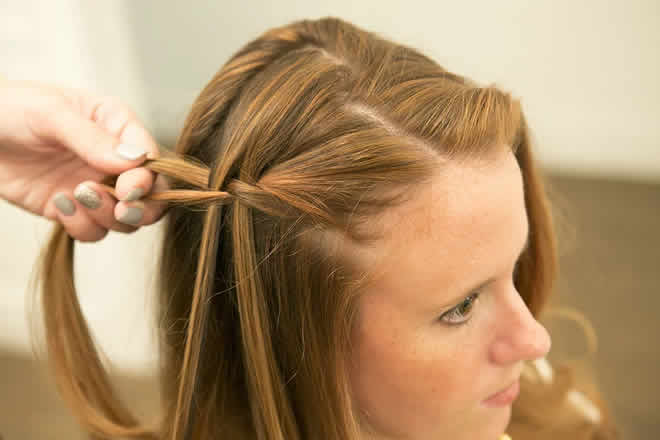
Step 3.

Take a new section of hair from the top of your head, and let it fall on top of the section you just pulled away from your face.
Step 4.

Drop the section of hair you just placed so it falls through your twist, creating that waterfall effect.
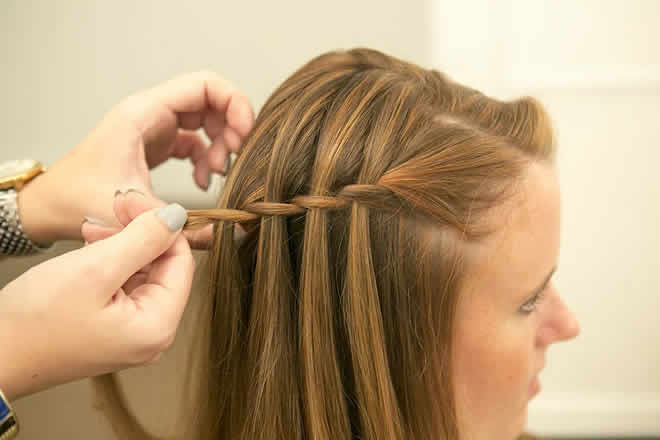
Step 5.
Take the bottom section of hair, and pull it over the waterfall section. Then take another section of hair from the top of your head to make another waterfall piece.
Step 6.
Let it fall through the other sections of hair.
Step 7.
Repeat the process until your waterfall braid is the length you want it. For this look, we just braided one side until it reached the back of the head.
Step 8.

Once you reach the end, extend the woven section of hair with a regular three-strand braid and secure with a clear elastic.
Step 9.

To hide the braided end, tuck it under the layers in the back of your head. Pin it in place by crossing two bobby pins in an X shape.
Step 10.
Drop your layers over the pinned-back braid, and admire your pinnable hair!